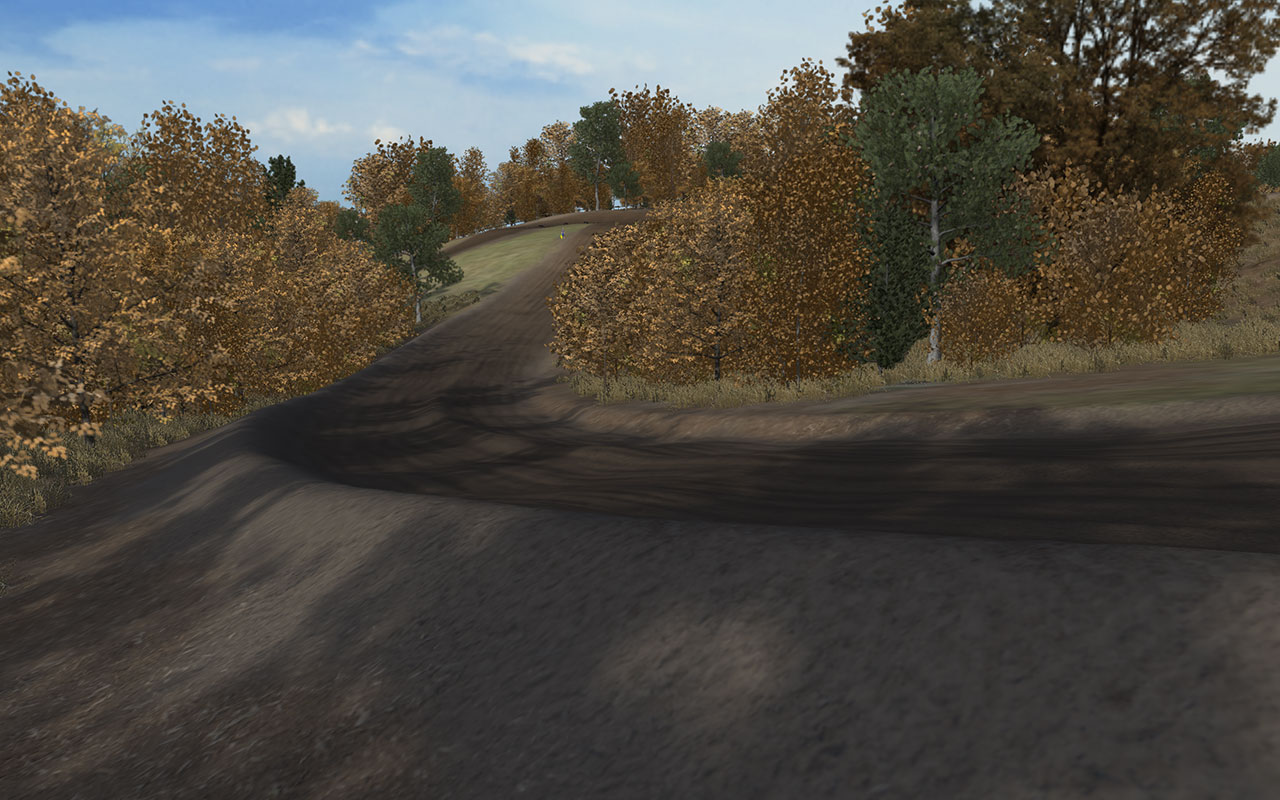
With my first track (pictured) I placed every tree individually, then used Excel to randomize their heights. I liked the end result but it was far too time consuming. SMR 510RR has a method he uses to scatter crowds around tracks, which is very promising, but relies on expensive software. So, for a while I've been searching for a method using more accessible means.
I've finally found a way to do what I want. That is, randomly scatter objects across an area according to a density map, similar to the way probability maps worked in MCM2. I can run through this process in 10-15min, though I'm sure there are ways to make it more efficient. To those smarter than me, I would love to hear any ideas. I imagine with some clever programming, the Blender and Excel steps could be eliminated.
Anyway, here's what I have so far:
Tools Needed:
- Photoshop/GIMP/etc.
- Blender
- Excel
- Text editor, such as Notepad++ (I actually use Dreamweaver)
- Wheels' Blender object placement script: http://www.mediafire.com/download/31zf6 ... ent.v1.zip
- Chebhou's Blender weight & color script: http://www.mediafire.com/file/a0n37y7fp ... ert.py.zip
In this case we will be placing billboard trees, though this technique could be used for placing crowds, statues, etc.
1. Create a 512x512 8-bit Grayscale probability map in Photoshop/GIMP/etc. White=maximum density, black=0 density
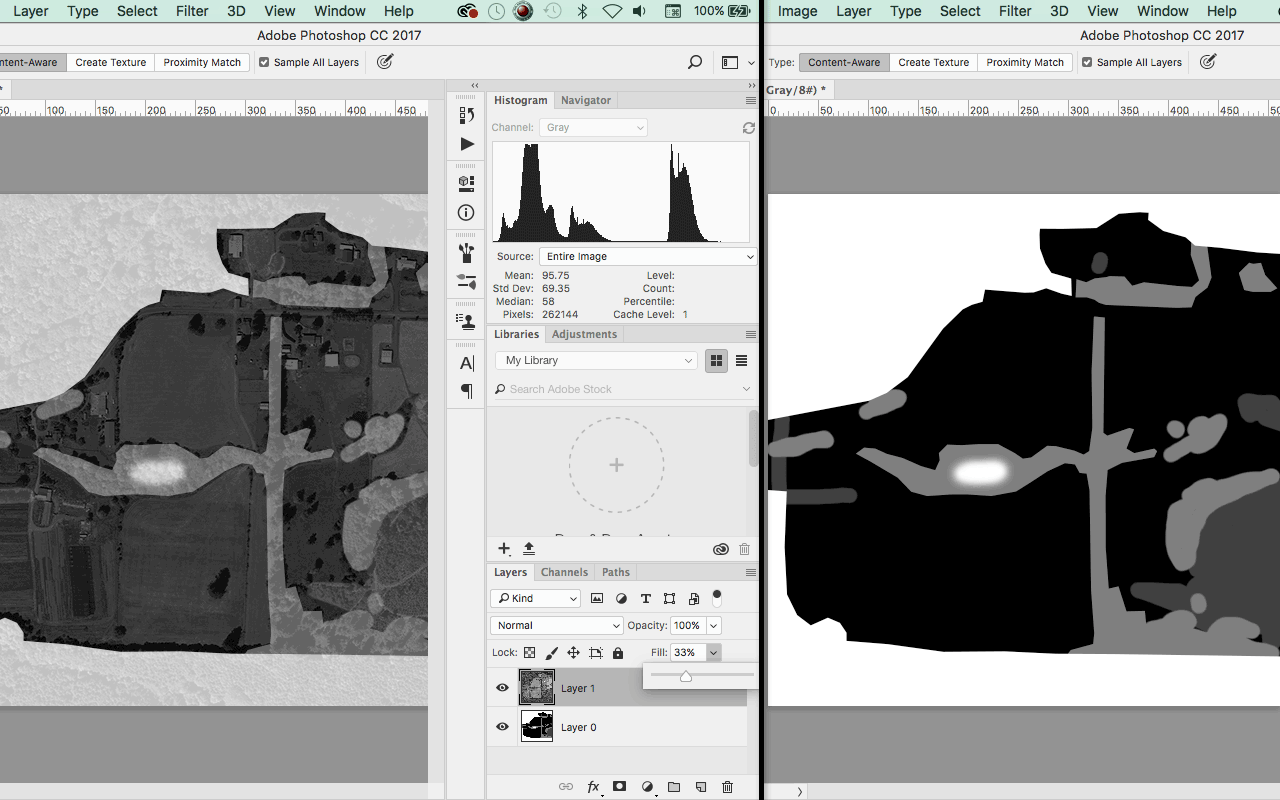
Left, probability map with low opacity reference image. Right, actual map.
2. Open Blender and delete the default scene.
3. Create plane to the size of your MXS world (In Game Size=(terrain.png resolution-1)*terrain.hf scale).
4. Reposition the plane so the corner is at 0, 0 (Location: X=In Game Size/2, Y=-In Game Size/2)
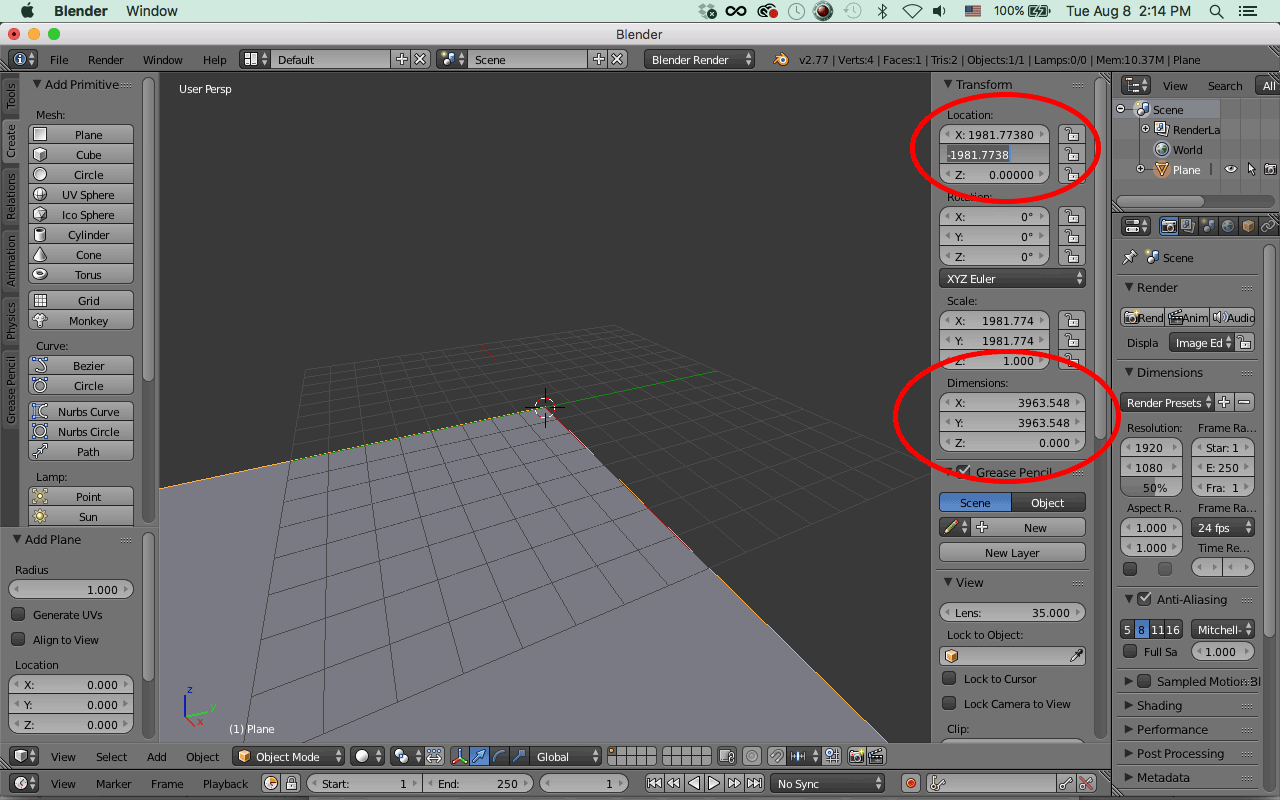
Note: My scale is unusually high in this example.
5. Create a new cube. This will be a placeholder for the object you want to scatter.
⁃ In Object tab, scroll down to Custom Properties. Click "Add," then click "Edit." Enter the following values:
⁃ Property Name: texture
⁃ Property Value: path to your tree billboard (i.e., “mytrack/billboard/mybillboard”)
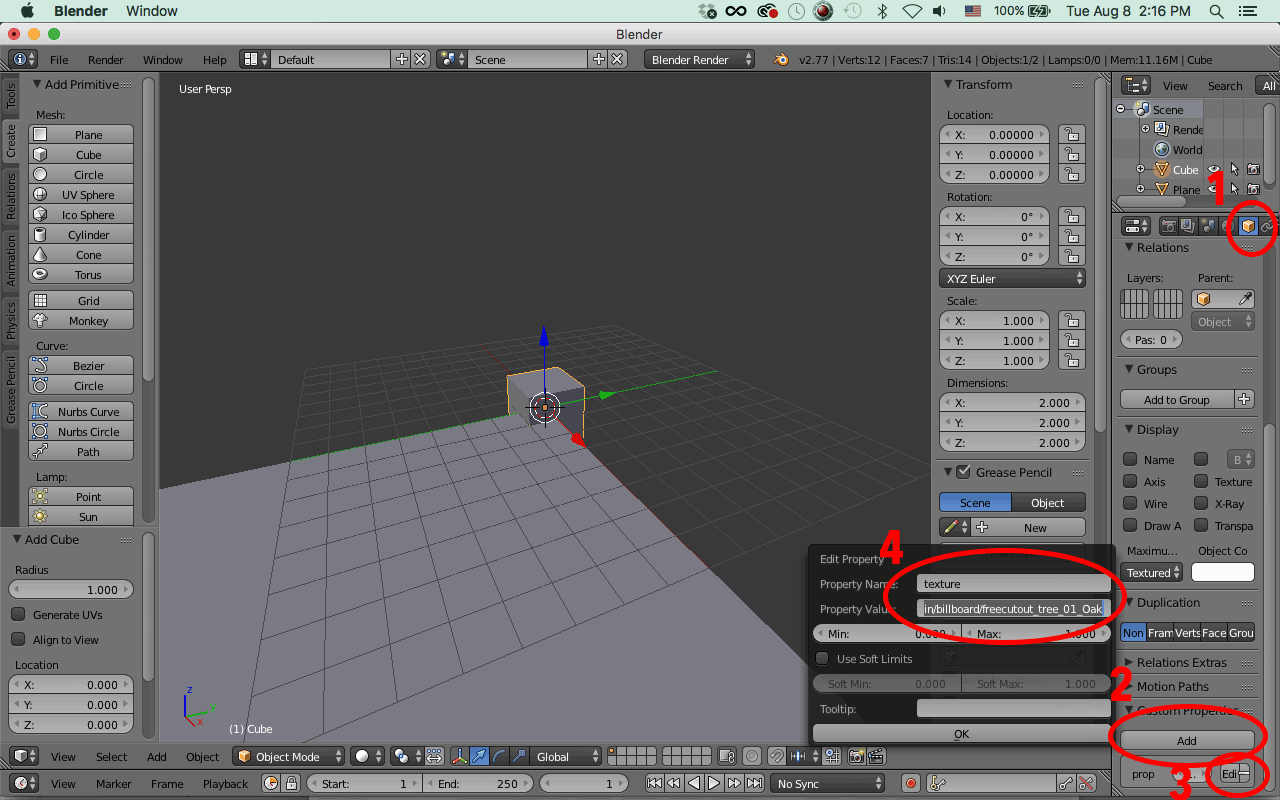
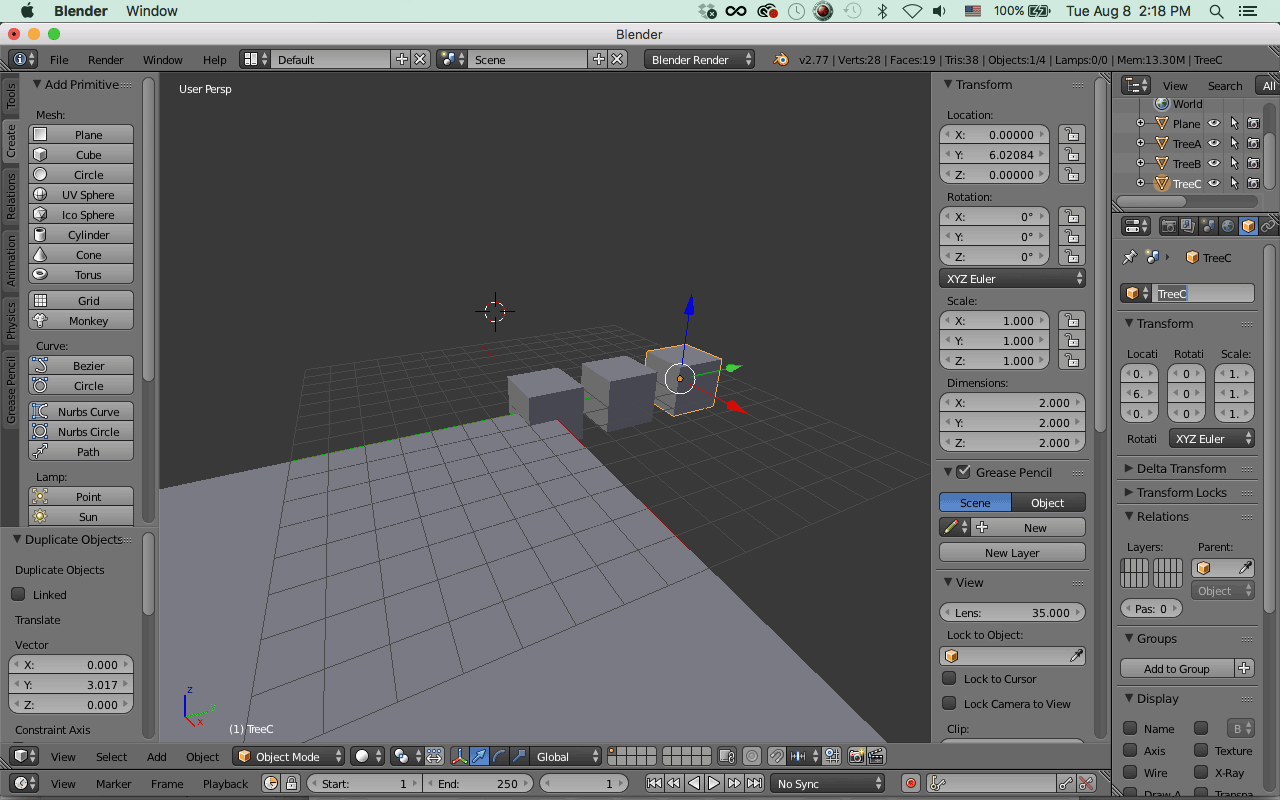
⁃ Optional: For variety, add additional cubes referencing different billboard files. Give each object a different name (i.e. TreeA, TreeB, TreeC, etc.)
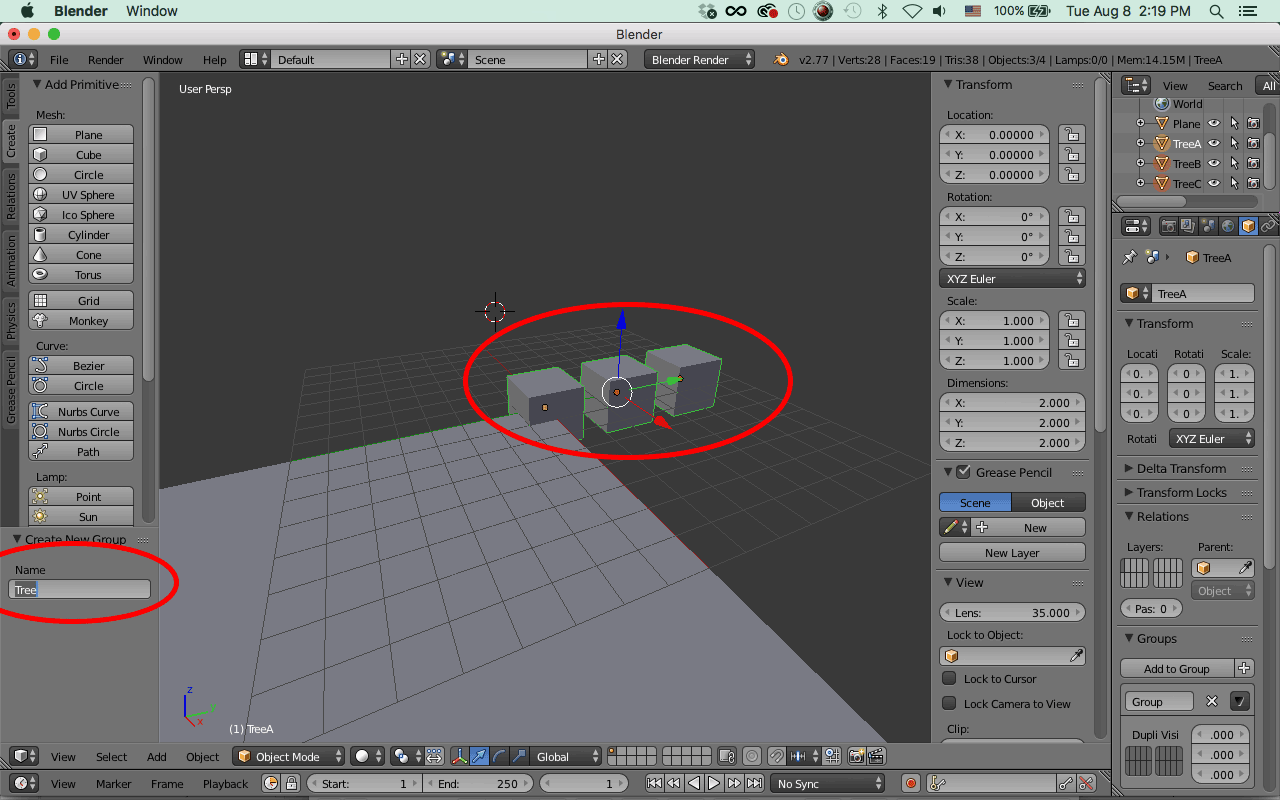
6. Select your cube(s) and hit Ctrl+G to put them into a new group. Name the group “Tree” or similar.
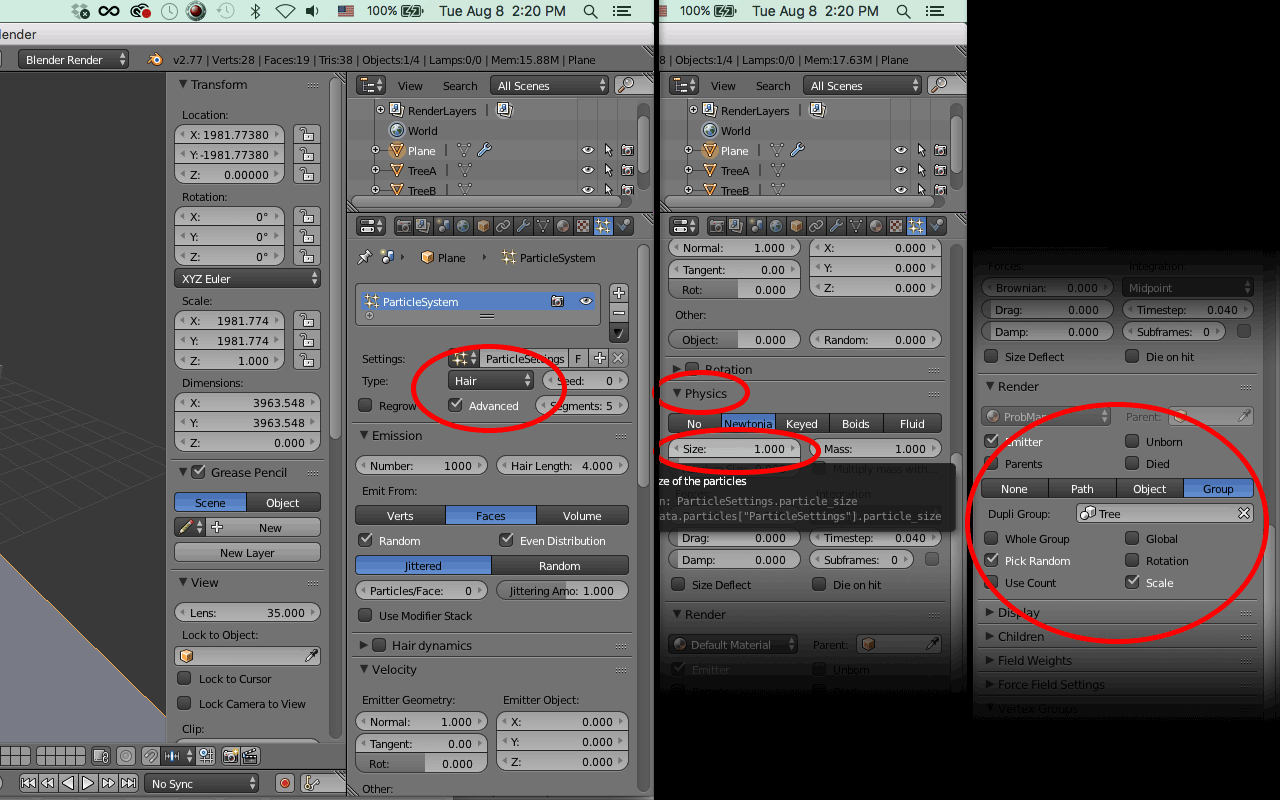
7. Select your Plane. Add new ParticleSystem

⁃ Enter the following values:
⁃ Type: Hair
⁃ Check Advanced
⁃ Physics: Size: 1
⁃ Render: Group
⁃ Render: Dupli Group: Tree (or whatever you named the group)
⁃ Render: Check Pick Random
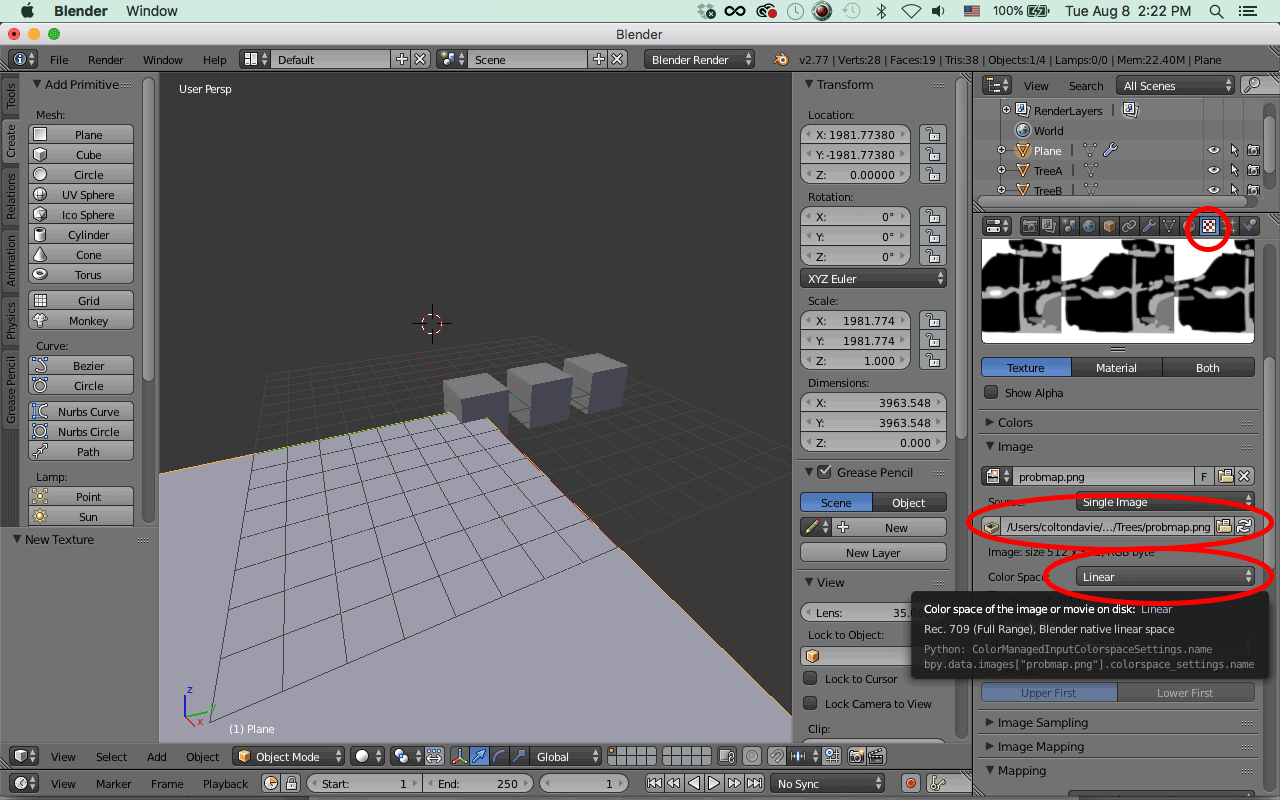
8. Add New Material “ProbMap”

9. Add New Texture to “ProbMap” material. Import your probability map image.
⁃ Image: Color Space: Linear
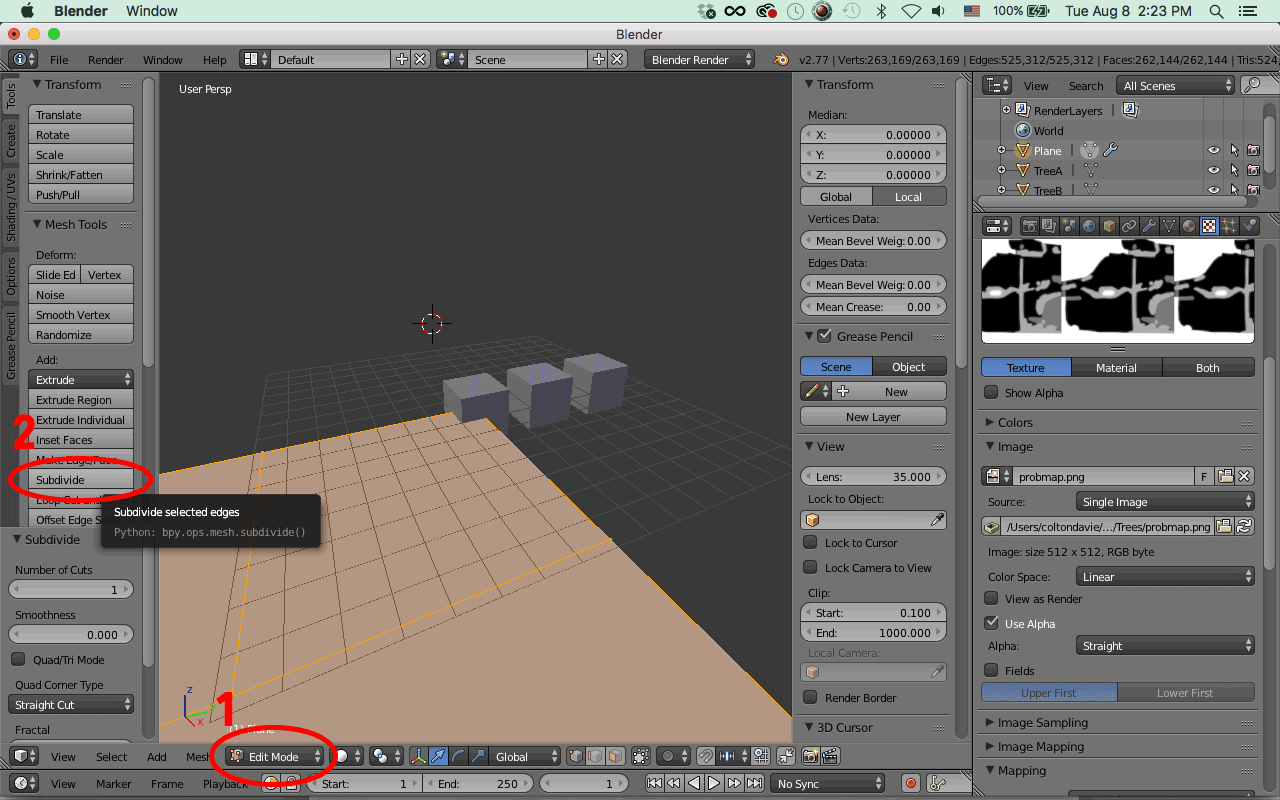
10. Switch to Edit Mode. Subdivide the Plane 9 times.
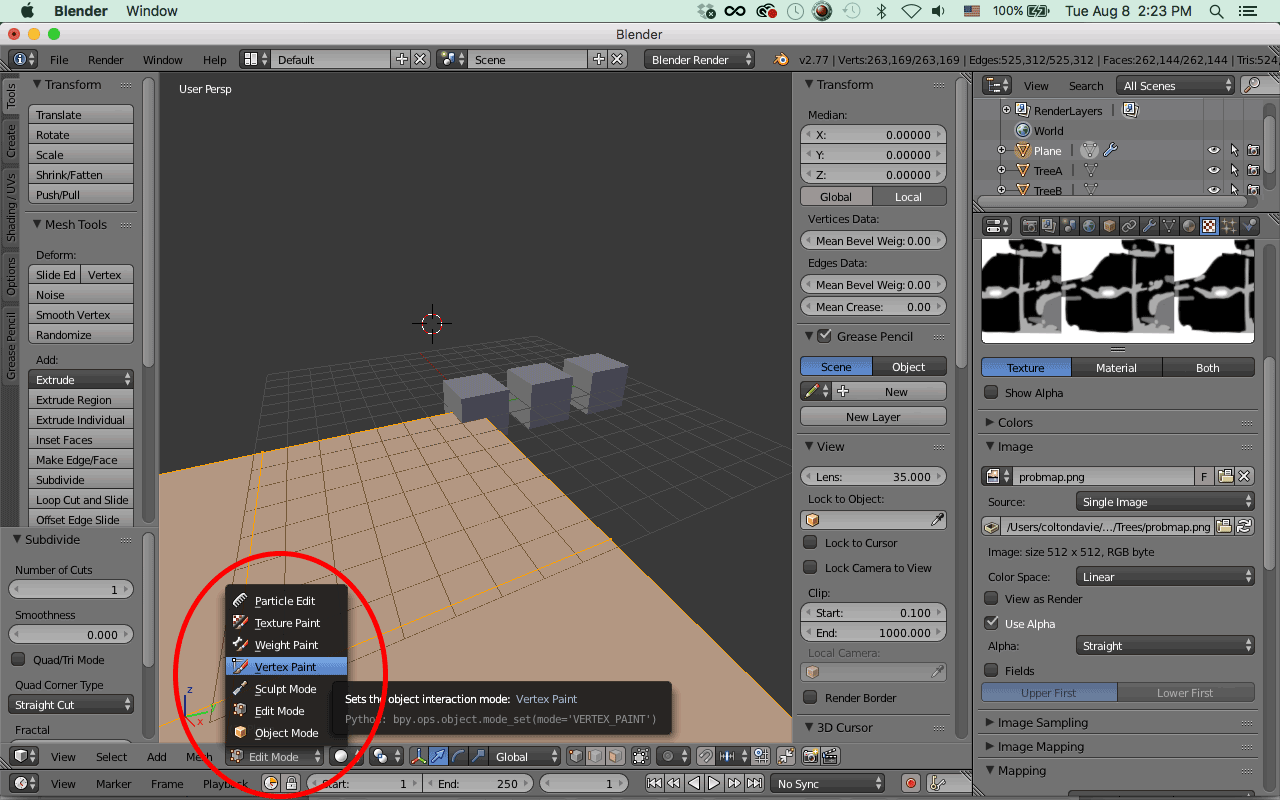
11. With the Plane selected, switch to Vertex Paint. Make sure Display Mode is set to Solid.
12. In the Texture panel on the left, select the probability map texture. Set the following value:
⁃ Brush Mapping: 3D
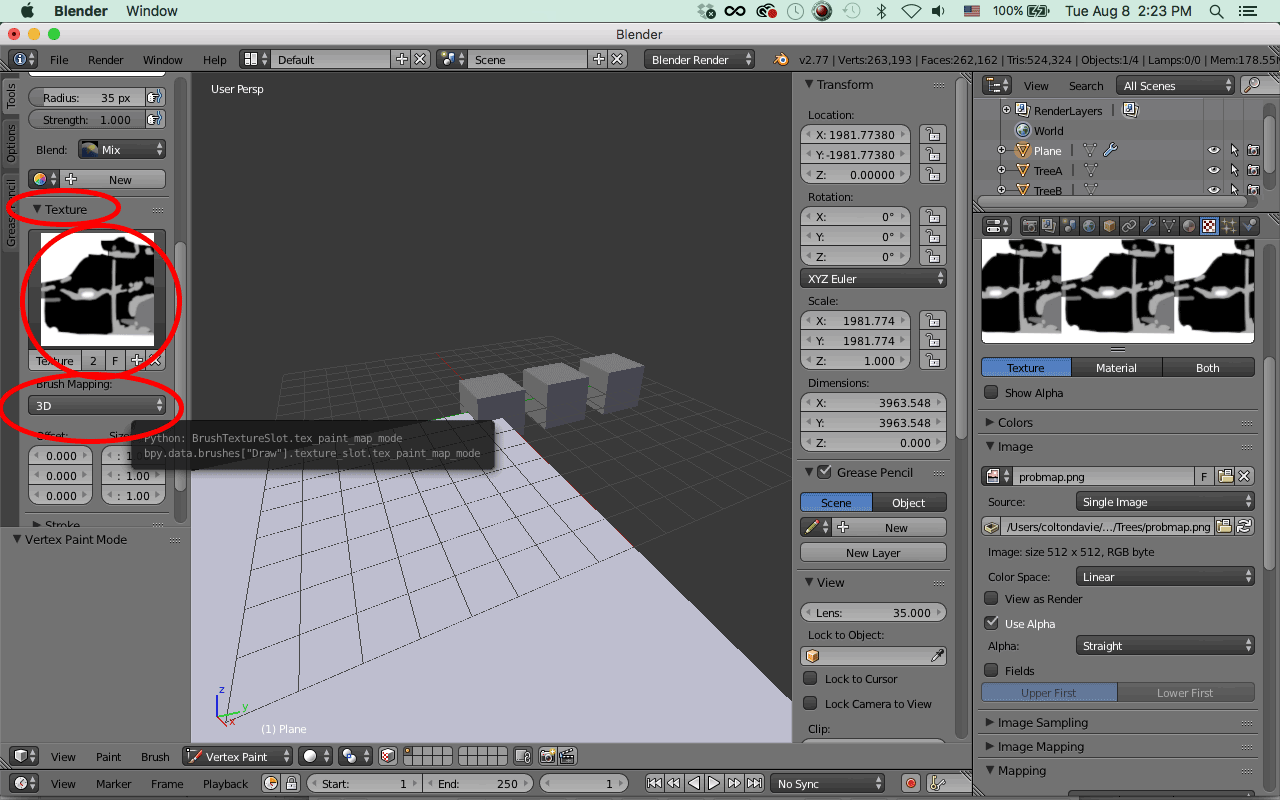
⁃ Switch to Top view, Orthographic. With large radius and Strength: 1, paint over entire plane

Note: I have experienced a case where using too large of a brush caused a glitchy looking grid to show. Painting over it with a smaller radius cleared it up.
13. Load weight.vertexcolor.convert.py into Text Editor. Run Script.
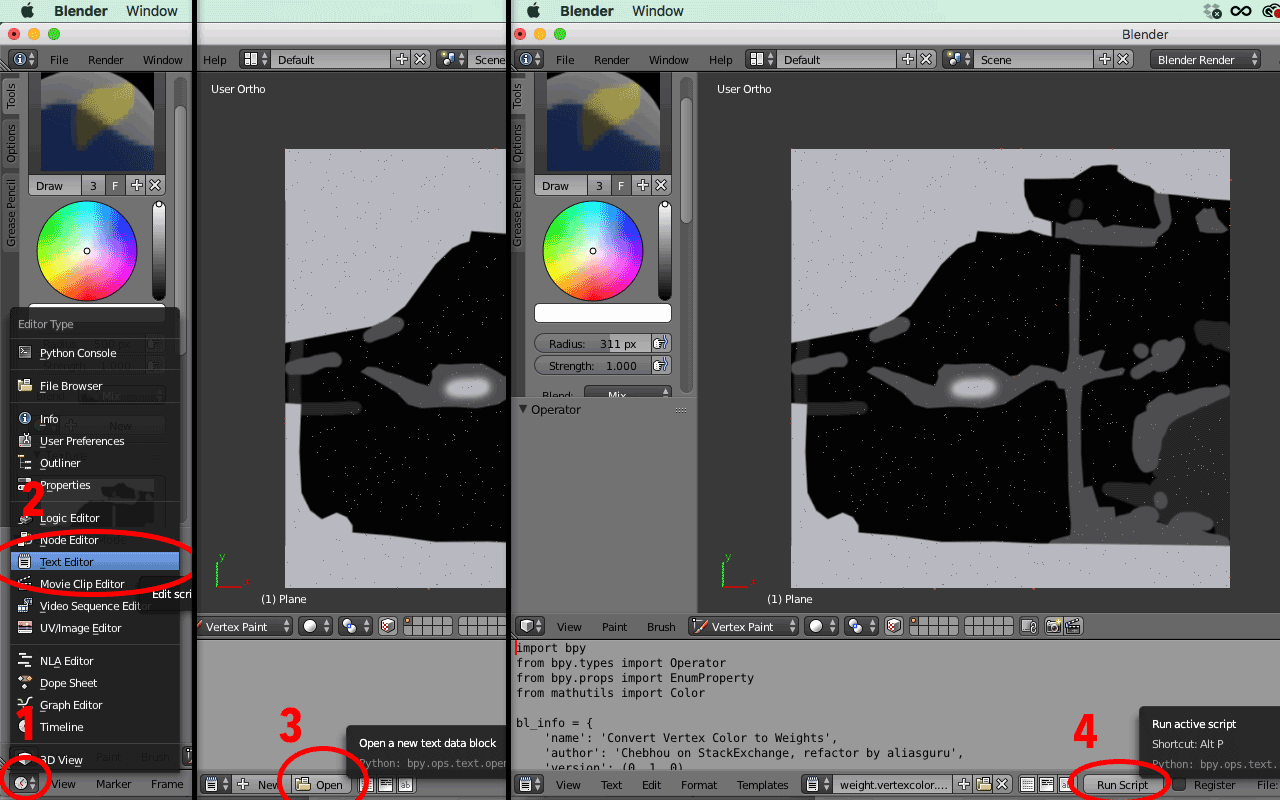
14. With Plane selected, hit Spacebar, type weight & color, and click the corresponding option. Enter the following values:
⁃ Convert: Vertex color to weight
⁃ Color type: Grayscale
⁃ Hit OK
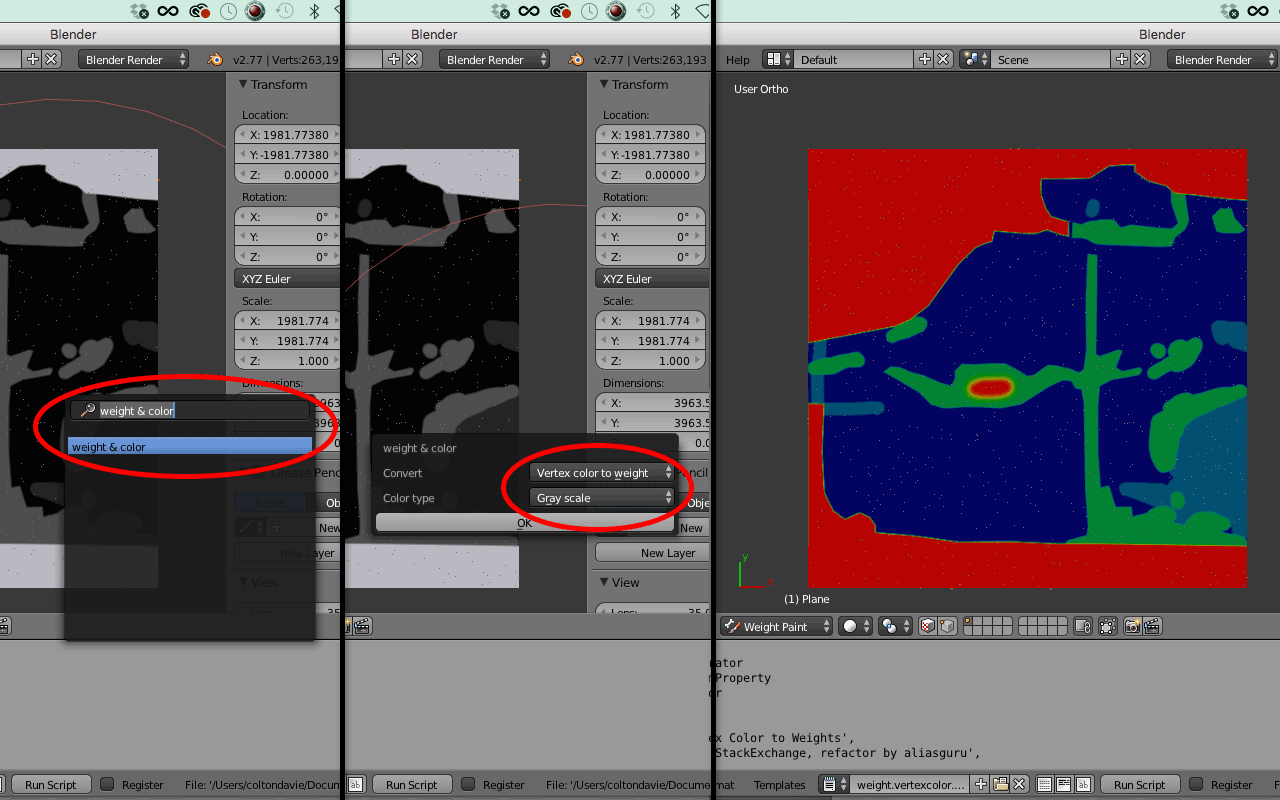
You should now see a color weight map, similar to the image on the right.
15. Go back to the Particles tab. Enter the following values:
⁃ Vertex Groups: Density: Col
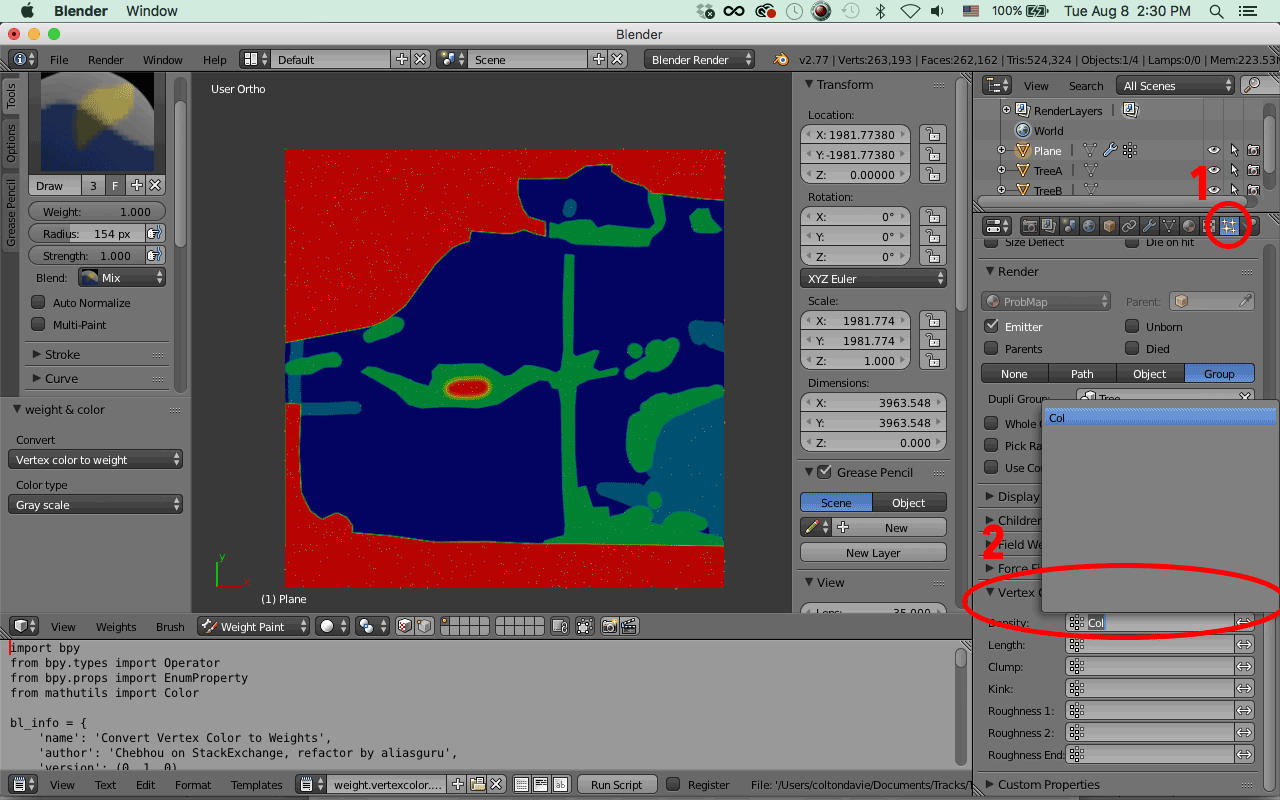
⁃ Optional: switch to Object Mode, change Display Mode to Wireframe.
⁃ Emission: Adjust to taste. This is the number of objects that will be placed.
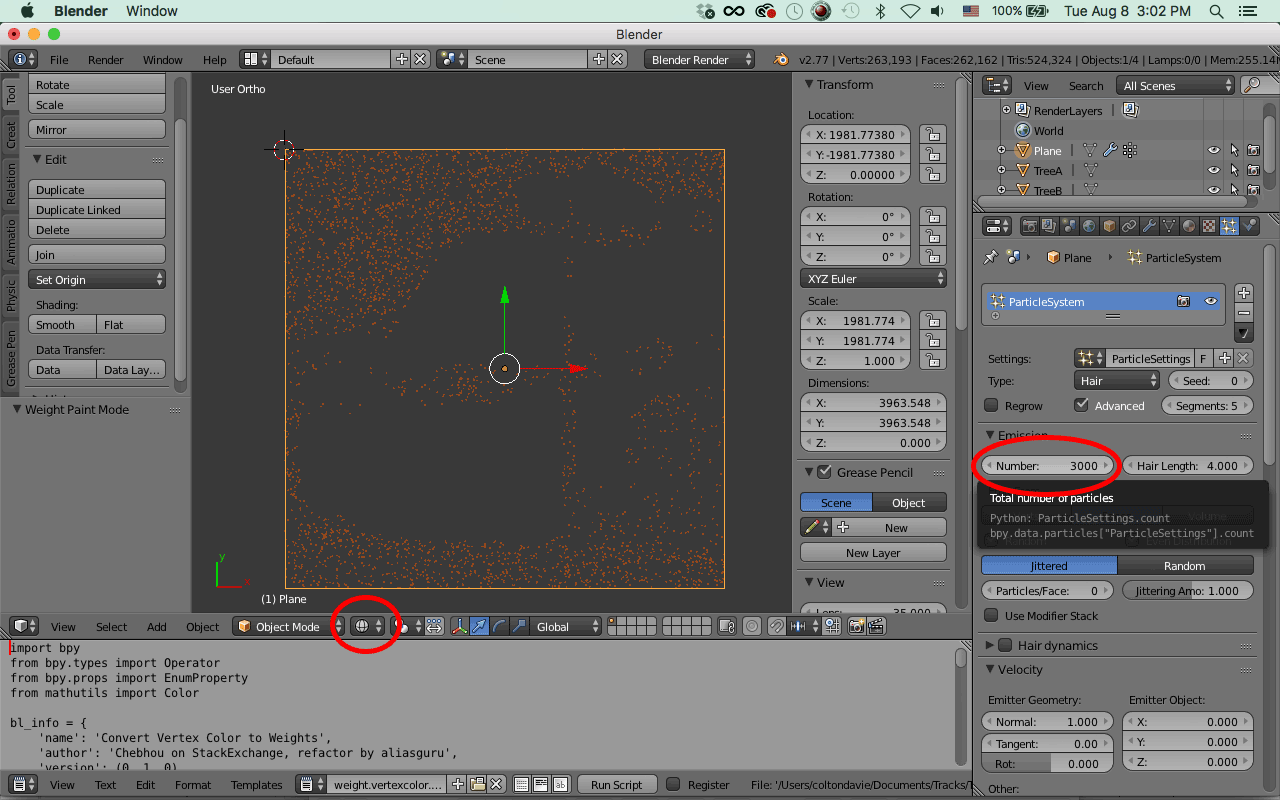
You should see a scattering of cubes corresponding to your probability map.
16. Switch to the Modifier tab. Under ParticleSystem 1, click Convert
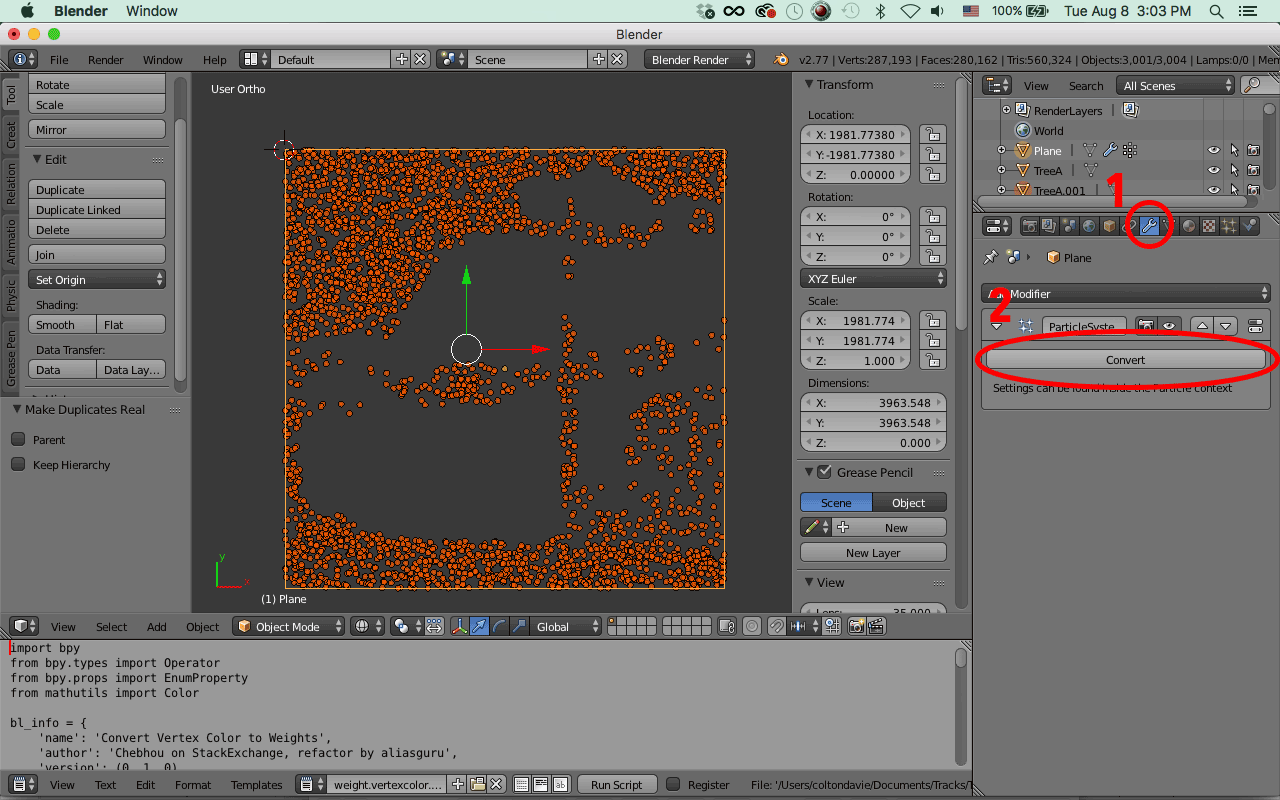
17. You should now have individual cubes all selected. Deselect the plane.
18. Open write.placement.v1.py in the Text Editor. Run Script.
19. Choose filename and destination and Export Some Data.
20. Open the exported file in Excel. The Text Import Wizard should appear. Enter the following values:
⁃ Original Data Type: Delimited. Click Next.
⁃ Delimiters: Check Space. Click Finish.
21. Column B is height. Set all values to -1 to ensure trees remain planted in ground even on a slope.
22. Column D is billboard size. In D1 type “=RANDBETWEEN(50,150)”. Adjust min and max to taste.
⁃ Copy this formula to all values in Column D.
23. Column E is aspect ratio. Set all values to 1, or whatever is appropriate for your billboard.
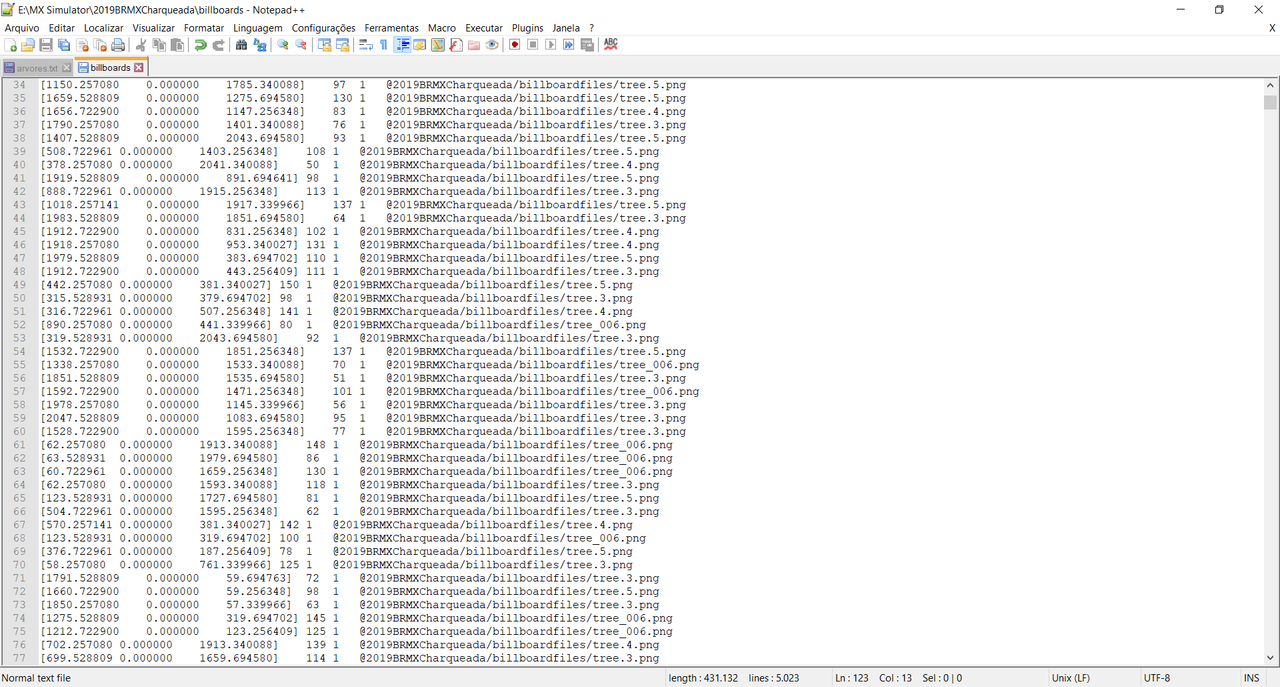
24. Column F is your billboard file. You should see all the billboard paths you entered in step 5.
25. Clear column G.
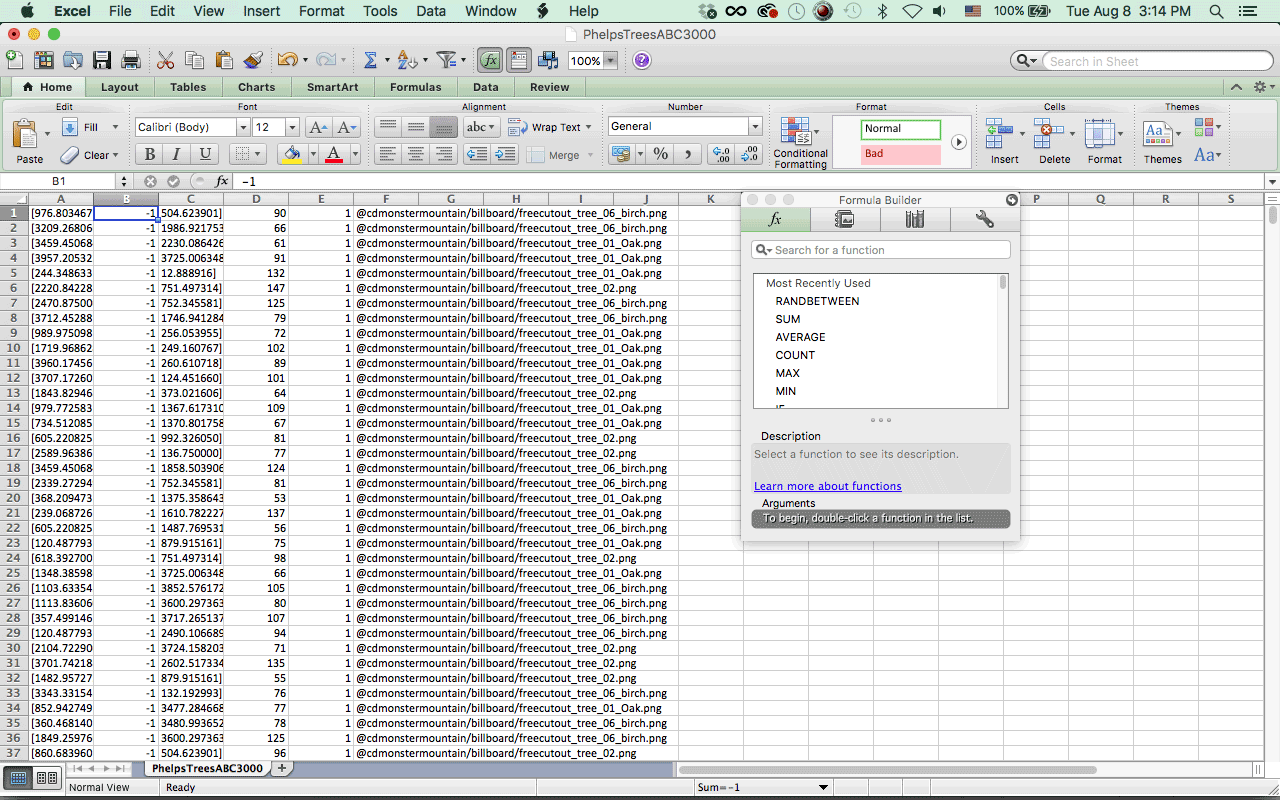
Your spreadsheet should look something like this by now.
26. File>Save. Click Continue.
27. Open the saved file in your text editor.
- Add an empty line at the end of the file.
⁃ Save As “billboards”
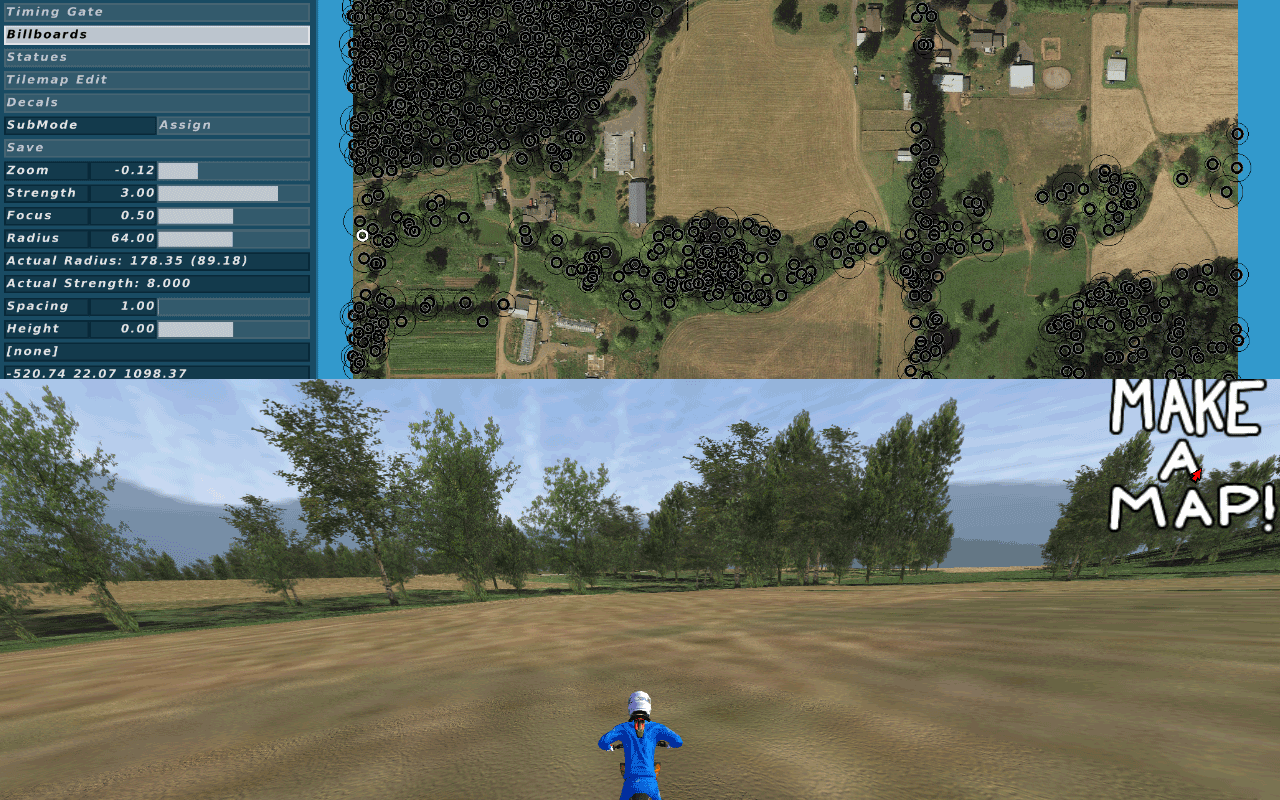
28. Place the billboards file in your track folder. Open MXS and you should see your track now populated with trees in game.
Of course, there are various ways you can use/alter this approach to suit your needs. For example, you can use it to place statues instead of billboards. Or you can use different probability maps for different types of vegetation. With some tweaking you could even use it to place decals.
Please share any creative uses you have, as well as any suggestions or improvements. Feel free to ask any questions as well, though to be honest I barely have a handle on it myself.
I would have never figured this out without the following sources:
Kamil Kuklo - https://evermotion.org/tutorials/show/1 ... f-the-week
Chebhou - https://blender.stackexchange.com/quest ... p-or-other
barrington314 - http://forum.mxsimulator.com/viewtopic. ... 49#p789449
wheels1758 - http://forum.mxsimulator.com/viewtopic.php?f=2&t=25508