sun_vector [X Y Z] - The location of the sun. Probably the most important part of the lighting for a well lit track.
The x-axis indicates the sun's distance east (positive) or west (negative) of the center of the map.
The y-axis indicates how high or low the sun is.
The z-axis indicates the sun's distance south (positive) or north (negative) of the center of the map.

So if we wanted the sun to be in the top left corner (or northwest corner) we could make the values [-1 Y -1], which moves the sun one unit to the west and one unit north from the center and is now aiming towards the center of the map. Basically, look at the layout of your track to best determine which direction you want the shadows to be casted
One important thing to keep in mind, any track sections that run parallel with the direction of the sun will be casting shadows on the front or back of a bump. Where this comes into play is erode and ruts in a section. You can shade the front or backside of a jump face with decal work since those won't be changing but you can't shade the ruts that form through out a race. So it is best to have the sun shining in a direction that is not parallel to any lane on the track (or as best as possible) for even lighting through out the entire track.
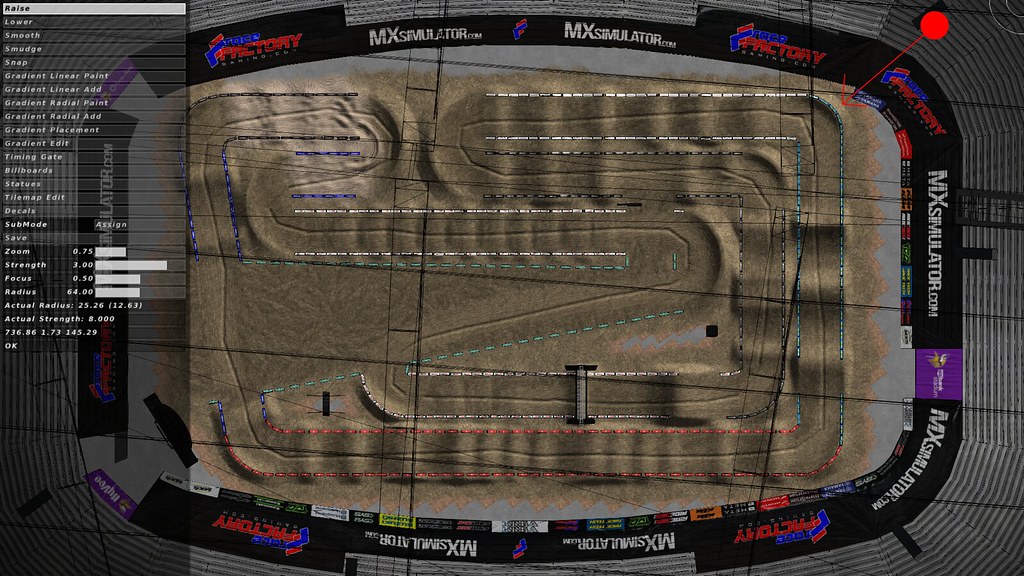
The sun will cast no shadows if centered. Here is [0 1 0] Terrible, no bumps are shaded.

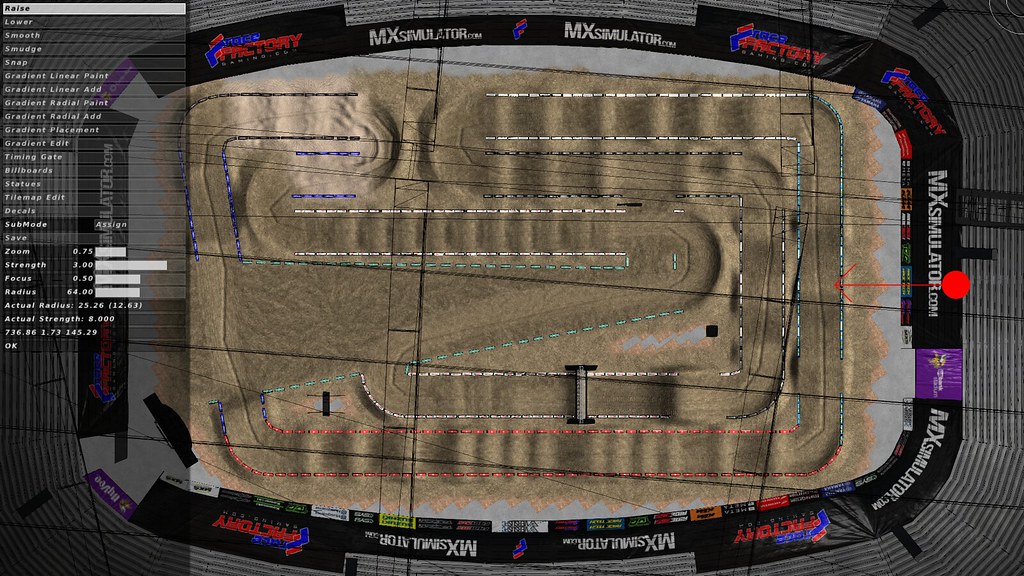
Now let's just move it straight east. Here is [1 1 0] Now you are able to see some ruts but others are still practically invisible.
So let's find a good place. Something diagonal should work just fine with this track layout. Keep in mind, the further away the sun, the darker the track will get but you will get deeper shadows. So find a happy balance that goes along with the style of track. We can also adjust brightness a few other ways. For this track, I've decided on [.75 .75 -1] works best overall for rut shading and overall track brightness.
sun_color [R G B] - Color/intensity of the sun.
Equivalent to RGB values in photoshop divided by 255. [1 1 1] would equal white, so something like [0.8 0.8 1.0] would have a blueish tint. Choosing a higher number will equate to more intense lighting and often it will wash out colors on trackside objects or the bike rider but you can go with something like [2 2 2] for an extreme bright lighting. If you moved the sun far away from your track for shadows and want to brighten it up without losing detail in the decals, make the sun color bright but keep an eye on objects.
ambient [R G B] - Dirt decal ambient lighting.
Same rules apply as the sun color, only this value only effects the terrain decals.This is another way to brighten decals, however raising this value will wash out details in the decal file as you brighten it up. It will also wash out lighten the shading. So play with these numbers if you have too dark of shading or decals on the track but like the rest of the lighting over all since this will only affect the ground.
global_ambient [R G B] - trackside objects/bike/rider/etc lighting.
Same color rules again, only this just affects objects. If your rider looks like he's way too bright compared to the rest of the track or washed out, lower these values. Or if he appears too shaded, raise these values.
near_plane 0.25
far_plane 5000
In 3D rendering there are two planes that control the nearest and farthest distances things can be rendered at.The closer together they are the more precise your Z buffer is.

Anything outside of the two planes won't be rendered. This setting is usually just set it and forget it for most tracks, but if you are having weird rendering issues on track objects, maybe try adjusting your far plane.


